It’s time to cut into our pretty fabrics. This is one of my favorite parts of the quilting process! If you need to refer to any other part of this tutorial, you can find all of the different parts linked below.
Part 2: Cut and Piece Strips
Let’s start with an overview of what we need to cut for this quilt top. This part of the tutorial will mostly focus on how to cut the improv strips that make up the center of the blocks and the flying geese blocks for the stars, but I will remind you at the end to cut out all of the other pieces needed.

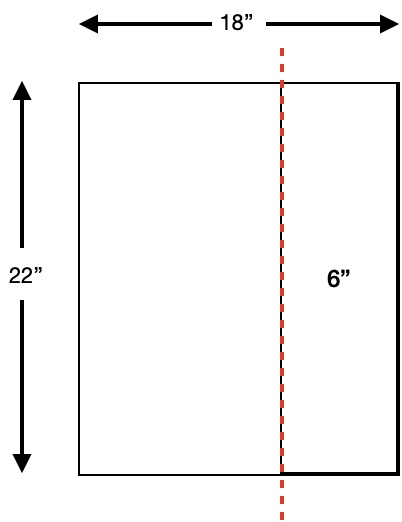
The first step is to sub cut the fat quarters. A fat quarter is a piece of fabric that measures approximately 18″ x 22″ and is sold at most fabric stores.
Lay out your fat quarter, and cut 1 – 6″ x 22″ strip, as shown in the diagram below:
Set aside that 6″ strip, and cut out 3 – 4″ x 22″ strips from the rest of the fat quarter, as shown below:

If you’re using scraps and have a ton of 2″ x 6″ and 2″ x 4″ strips already cut or collected, you will need to trim off a bit from each strip to give them that “improv” look. This method does take a lot longer.
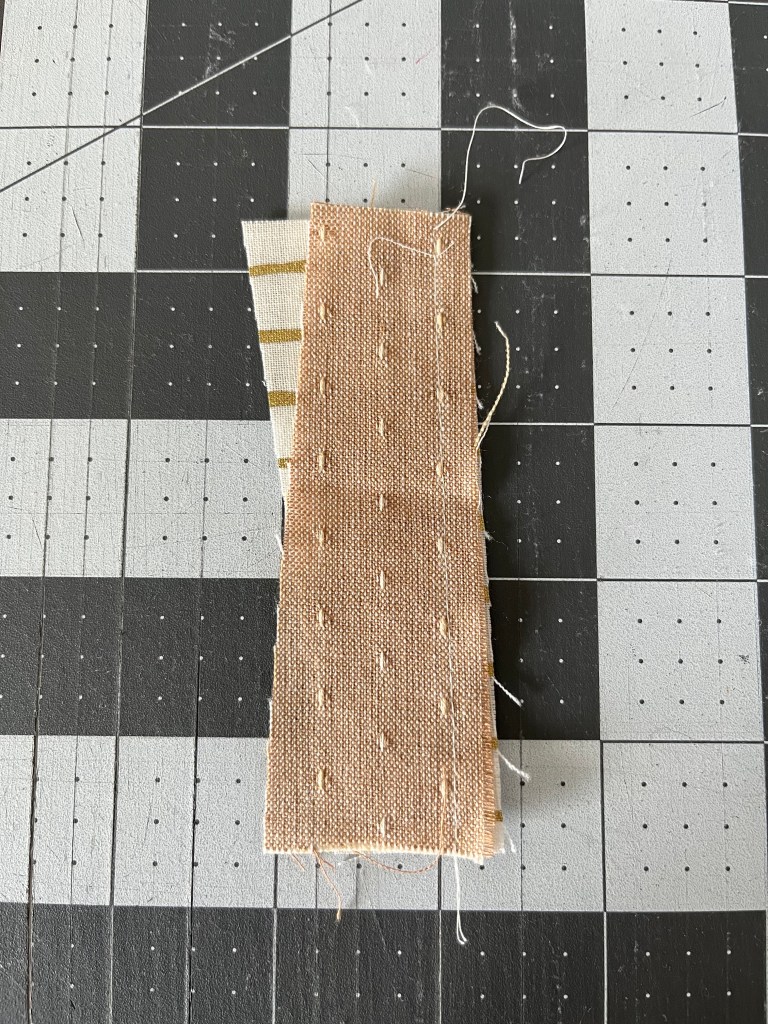
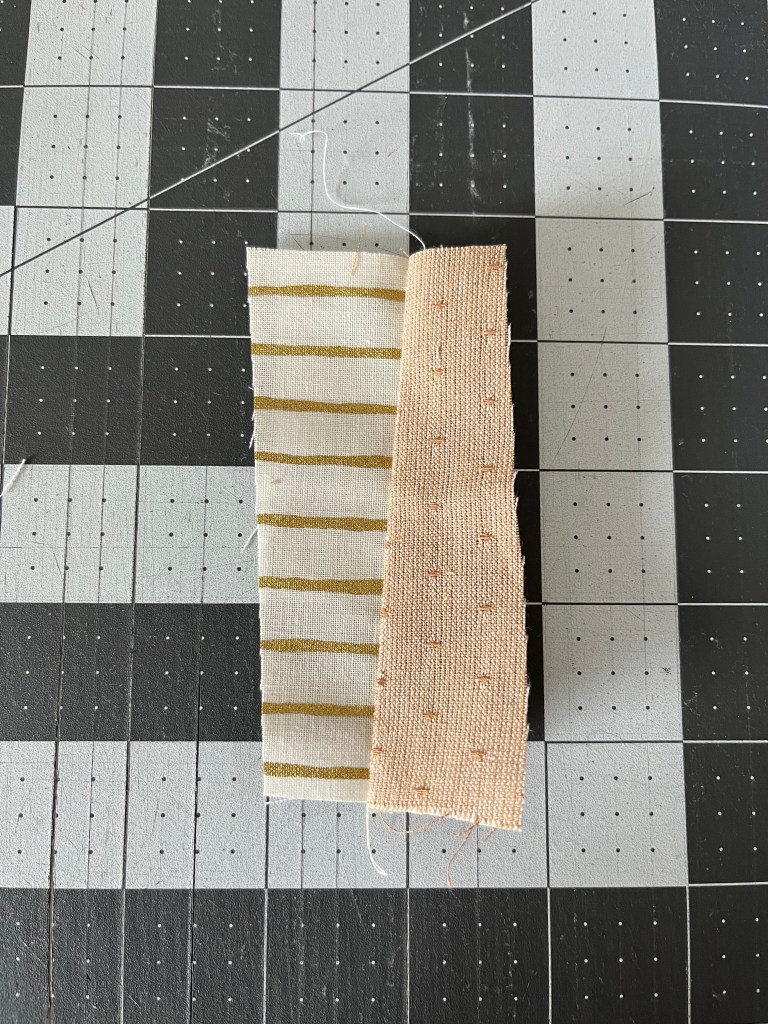
I chose to subcut from fat quarters and scraps, and then cut improv strips that are at least 1″ wide, as shown below.

Lay out the sub cut piece of fabric. Pictured above is the 4″ piece, but you will also do this for the 6″ pieces. Place your ruler on top of the fabric at a slight angle, and cut. Try and keep the fabric chunks around 1″ wide.

I like to alternate the angle of the ruler as I work my way along the sub cut of fabric, and that’s it. Then I throw the cut pieces into a pile of either 6″ or 4″ strips. Work your way through all of the fat quarters.
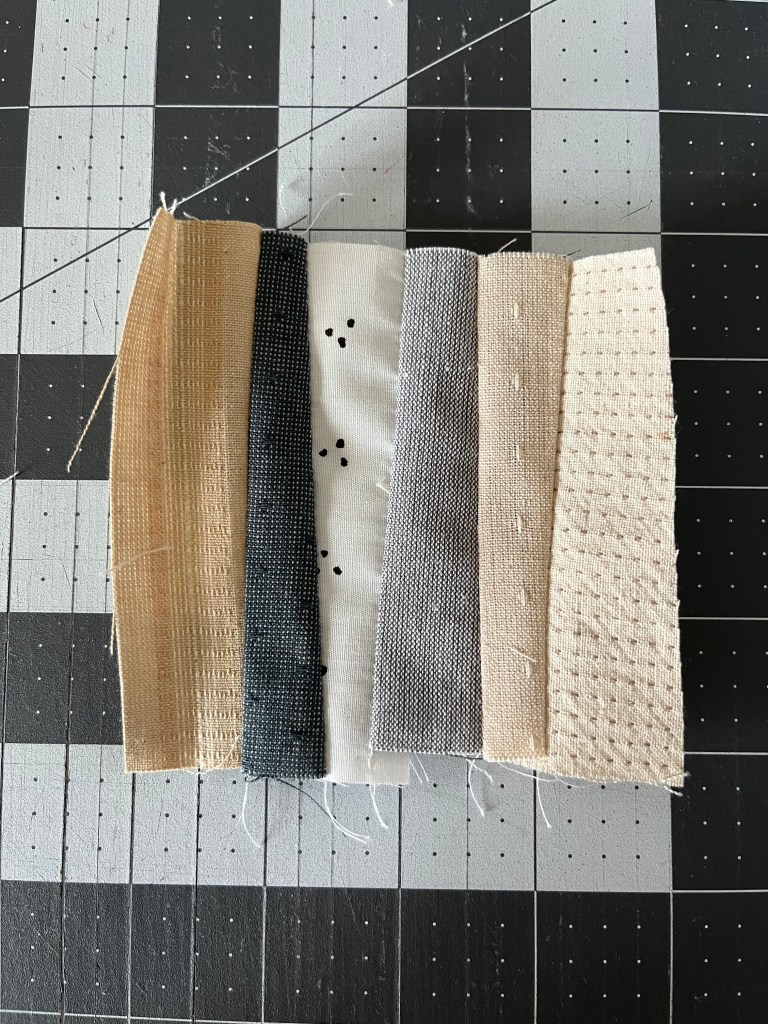
Once all of your pieces are cut, randomly arrange them to form blocks. For the 6″ pieces, each block will consist of 8 strips. For the 4″ strips, each block will consist of 6 strips.


I like to lay out all of my strips, and then sew them all at once. Make sure you alternate the wide and narrow ends so that the block remains somewhat square. Now would be a good time to get a good audiobook or podcast going, because this does take some time to do!

To sew strips together, line up two strips, and sew with 1/4″ seam allowance. Press seam. Continue sewing strips until the unit is finished.
Once all of the improv units are made, they need to be trimmed into squares. Trim all of the 4″ improv units to 3.75″ squares. Trim all of the 6″ improv units to 5.5″ squares. The most time consuming part is over. If you haven’t already, cut out all of your background pieces, as we will need them for the rest of the tutorial.

Leave a comment