It’s finally time to assemble our Snuggle Star quilt top together! If you need to refer to any other part of this tutorial, you can find all of the different parts linked below.
Quilt Assembly
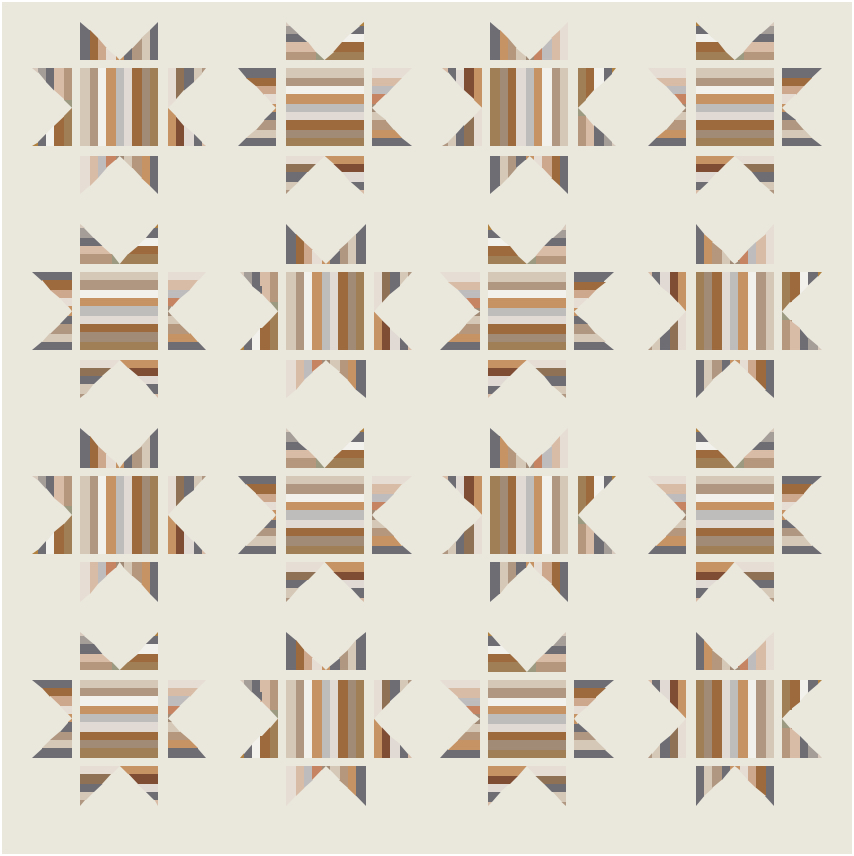
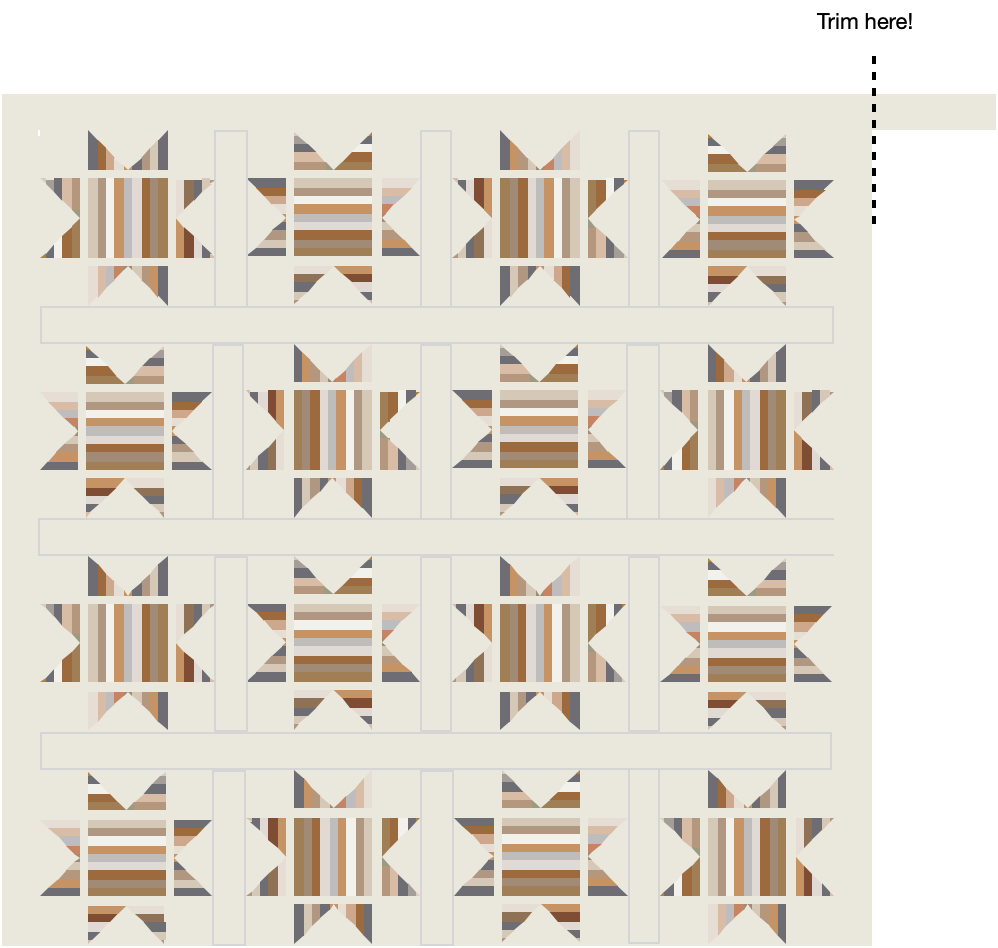
Step 1: Lay out your blocks so the direction of the stars alternate.
Sew a 2″ x 12.5″ strip in-between the blocks. There should be 3 per row.

It should look like the image below once you’ve sewn the 2″ x 12.5″ strips on. Press seams open.

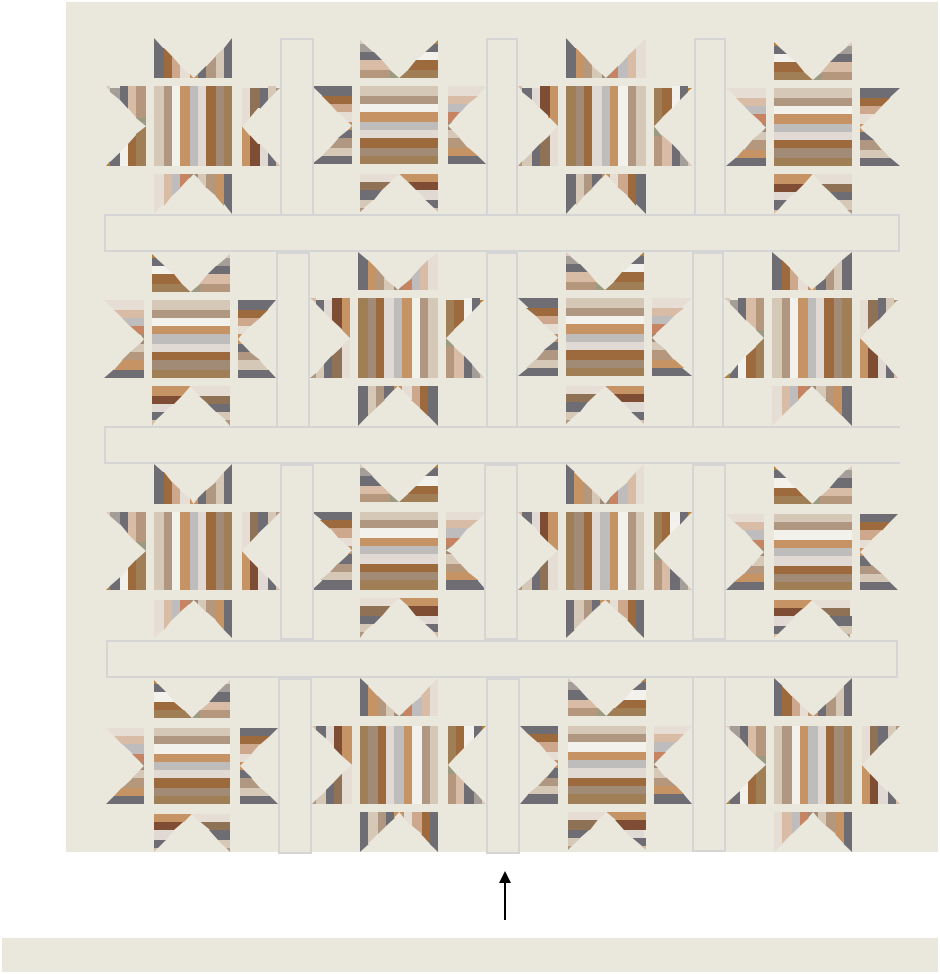
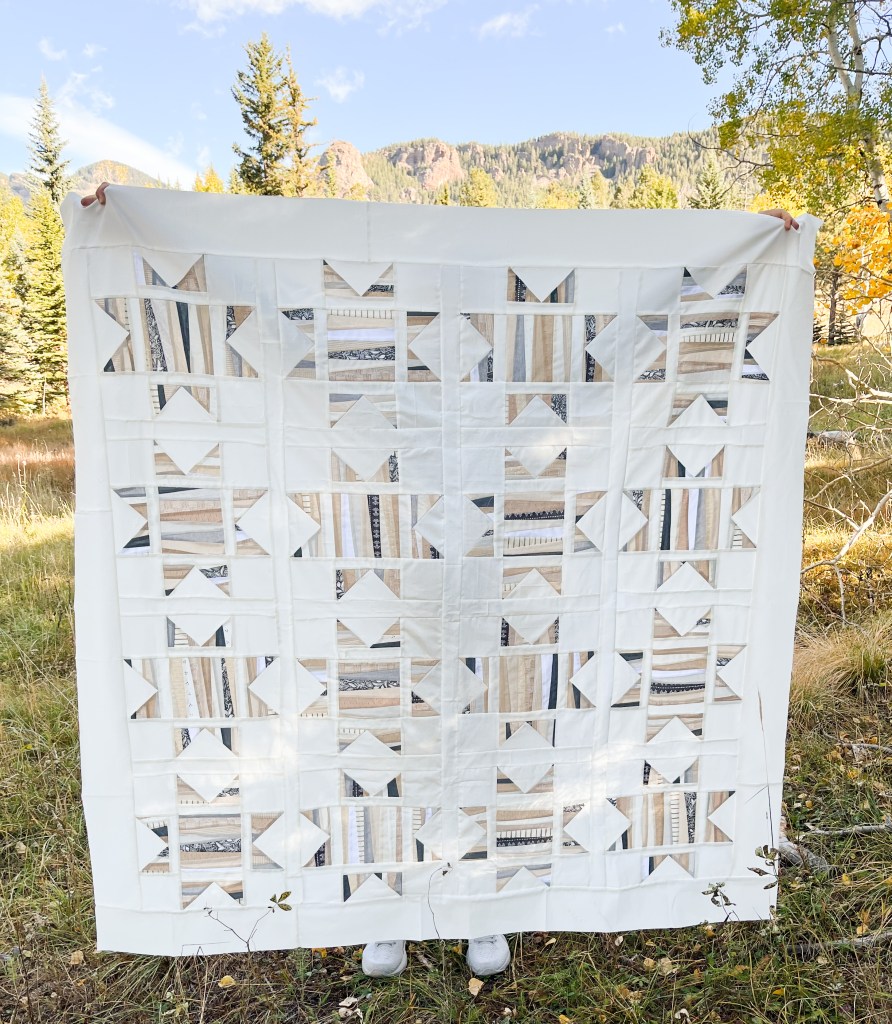
Repeat for rows 2, 3, and 4, taking care to arrange your stars. The first star for rows 1 and 3 should be vertical, and the first stars for rows 2 and 4 should be horizontal. Here’s a visual reminder of the finished quilt layout!
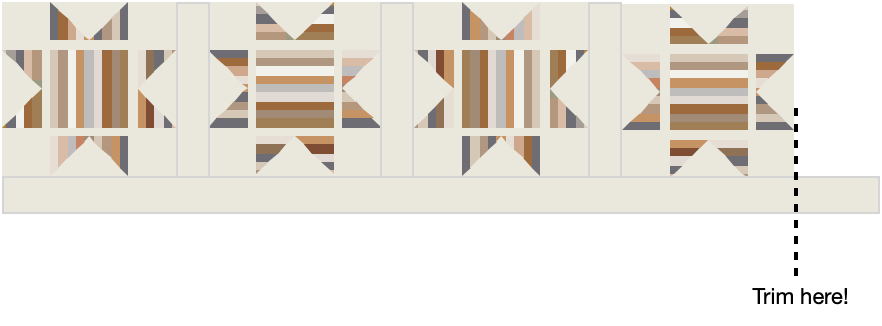
Step 2: Sew together the 4 – 2″ x WOF sashing strips into one long strip.
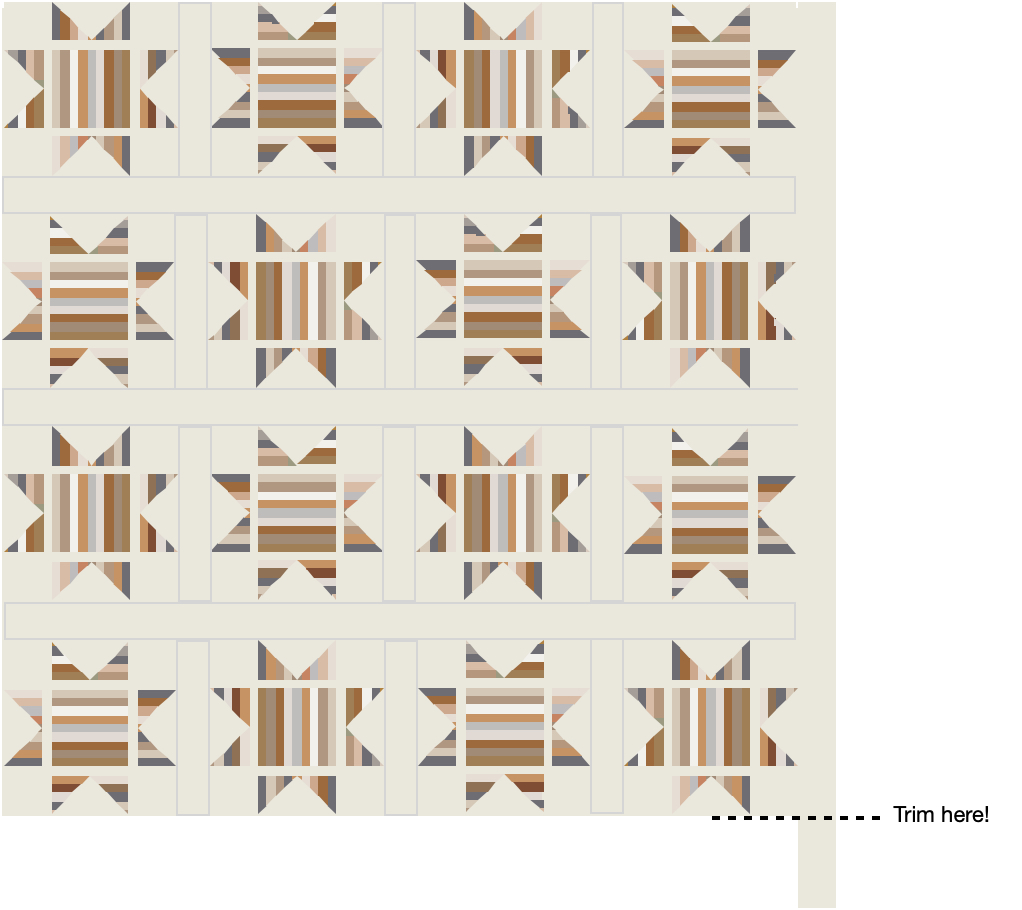
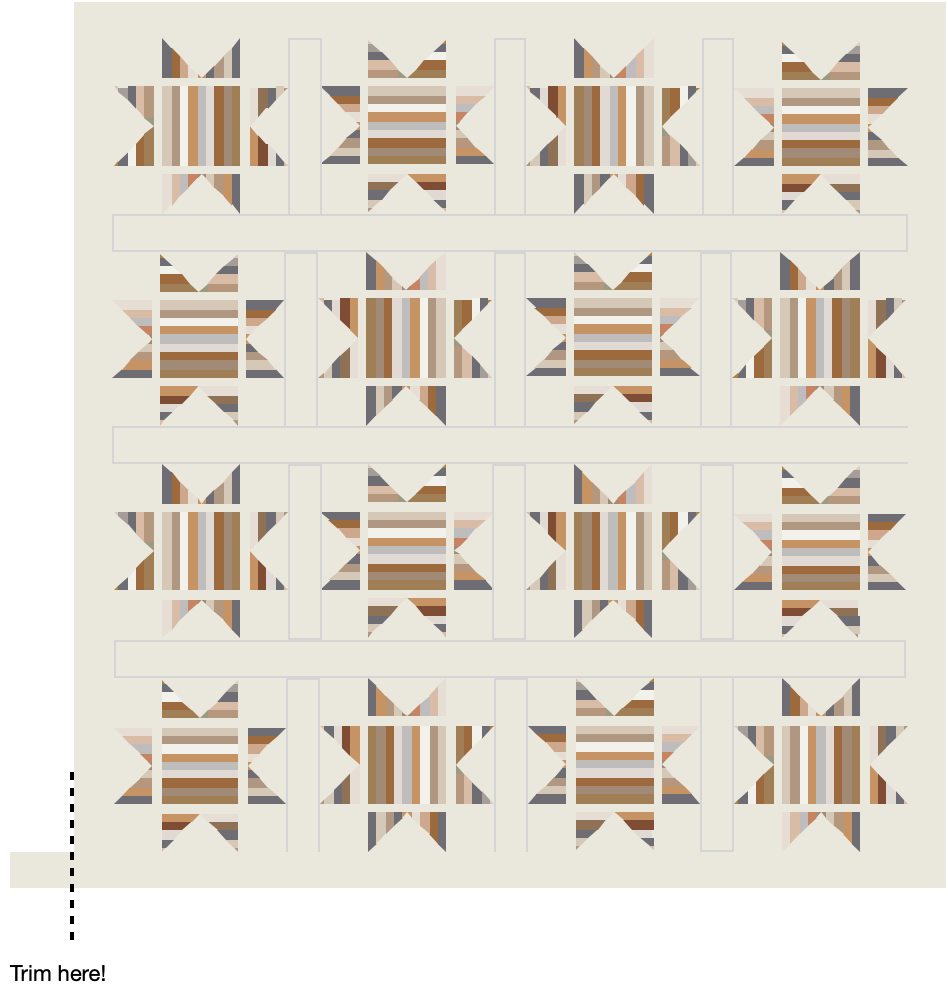
Lay out row 1, and sew the sashing strip to the bottom of the row, and then trim. Press seams open. Repeat with rows 2 and 3.

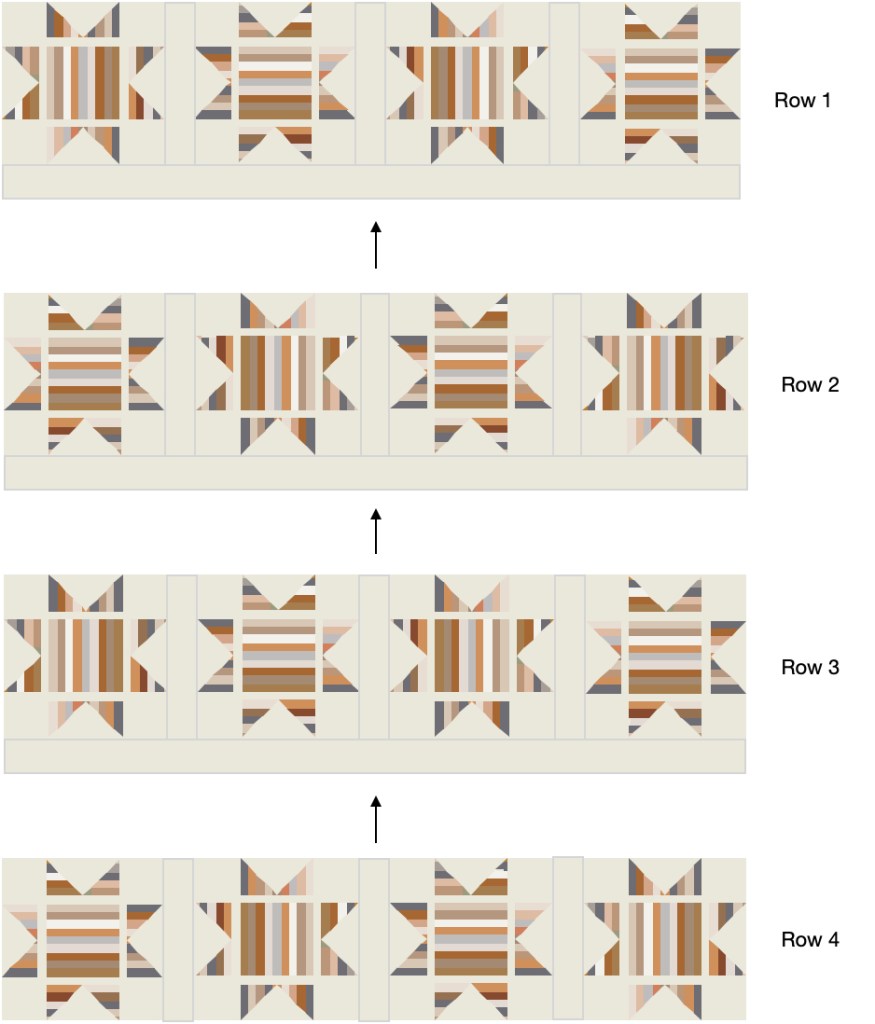
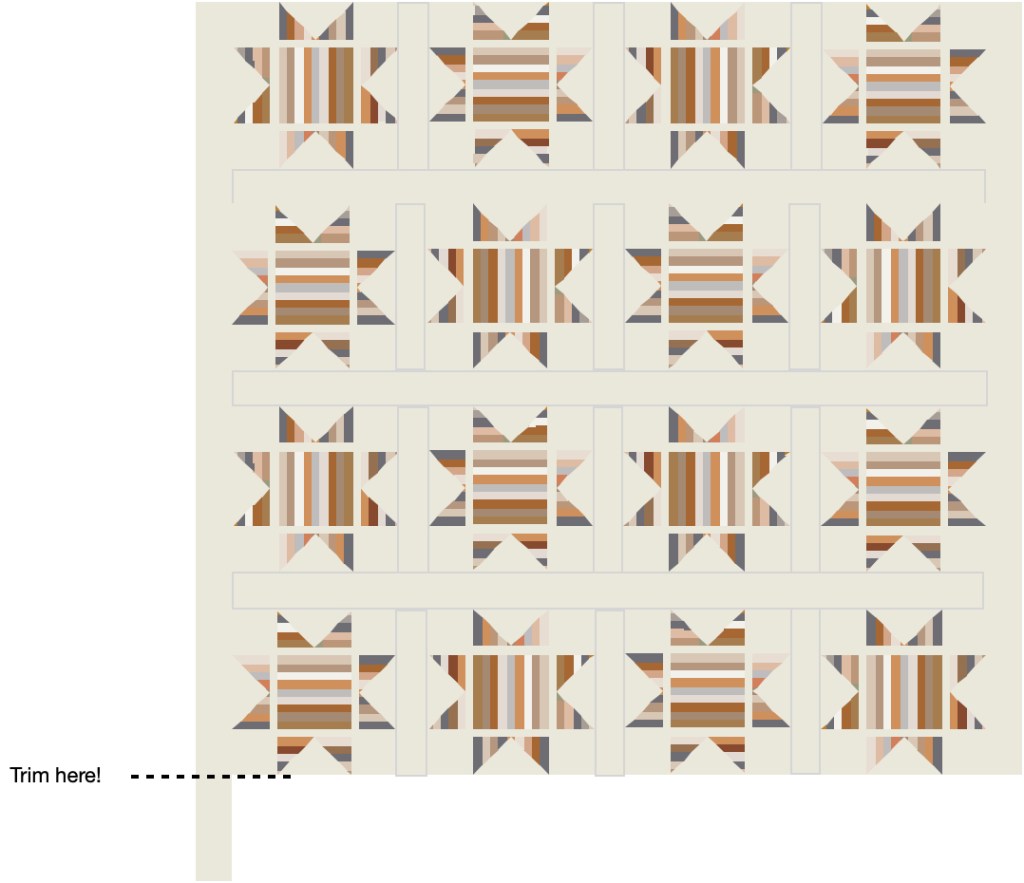
Next, pin and sew row 2 to the bottom of the sashing you just attached to row 1, and press seams open. Then sew row 3 to the bottom of row 2, press seams open. Sew row 4 to the bottom of row 3, and press seams open. Refer to the image below as needed.
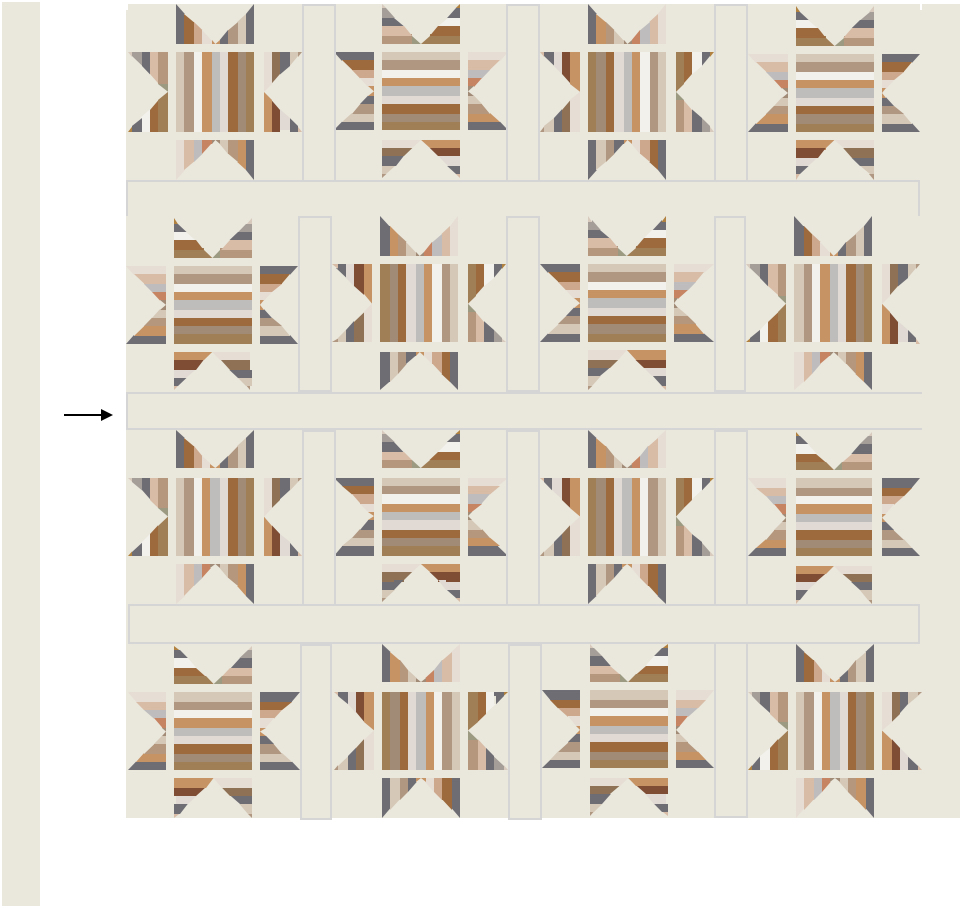
Step 3: Time to add the border! Take the 6 – 2.5″ x WOF strips, and sew together to form one long strip.
Pin and sew the border strip to one side of the quilt and trim. Repeat on the other side.
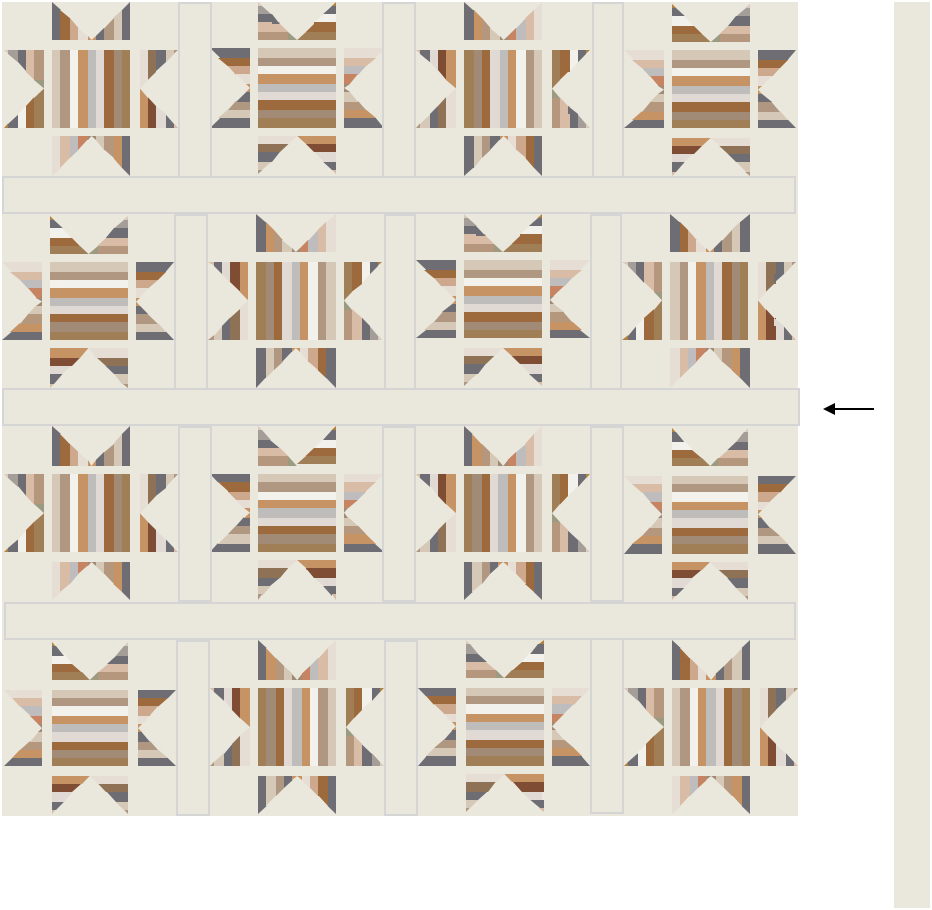
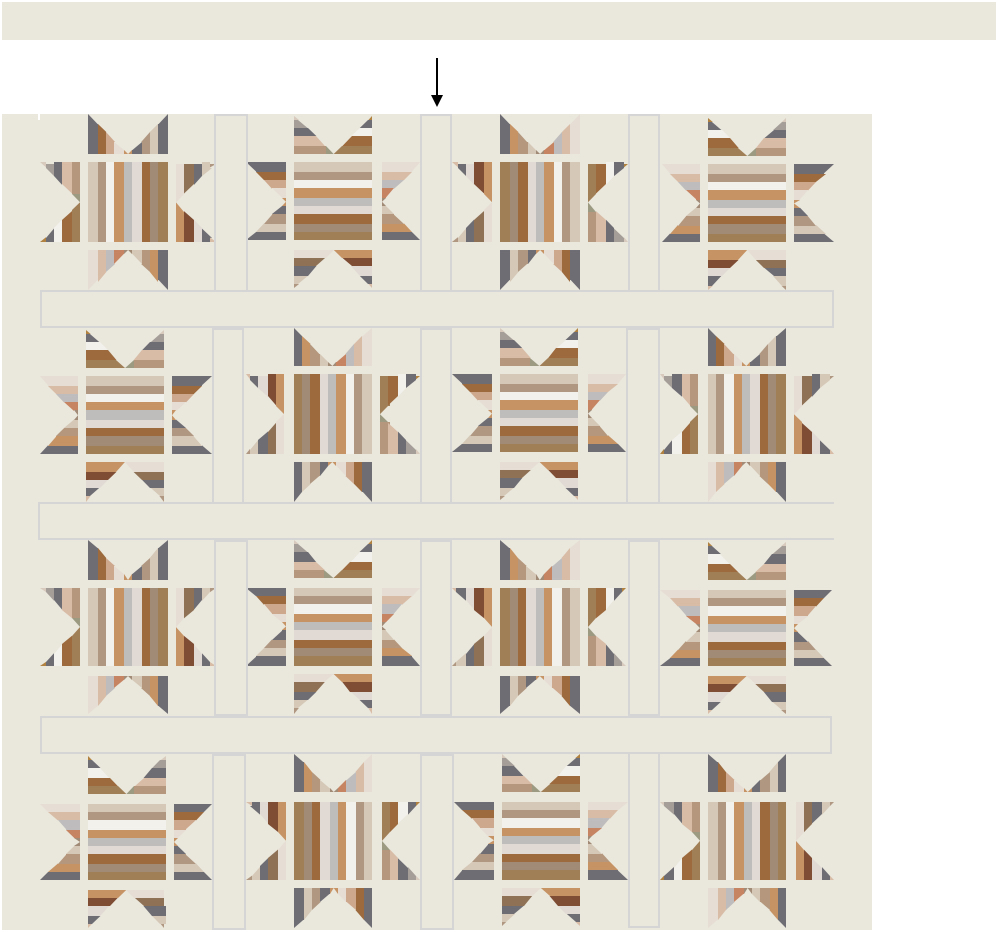
Next, take the border strip and pin and sew it to the top of the quilt, and then trim. Take the remaining border strip and pin and sew it to the bottom of the quilt. Trim.
Finishing the Quilt
1. Create a quilt sandwich by laying out the quilt backing, wrong side up. Lay batting on top of your backing fabric. Then, lay out the quilt top, right side up.
2. Baste quilt: typically with either pins or basting spray.
3. Quilting time! You can machine quilt, hand quilt, or send your quilt off to a longarm quilter for a luxurious finish! Once the quilting is finished, square and trim your quilt.
4. The last step is to bind the quilt. Using the 2.25” x WOF strips, sew them together to create one, long strip. I prefer to use a diagonal seam when I do this. There are several tutorials online to help you with this. Once the strips are joined, fold in half, and iron. Line the raw edge of the binding tape to the raw edge of the quilt, and sew. Fold over onto the other side of the quilt and machine or hand sew this down.
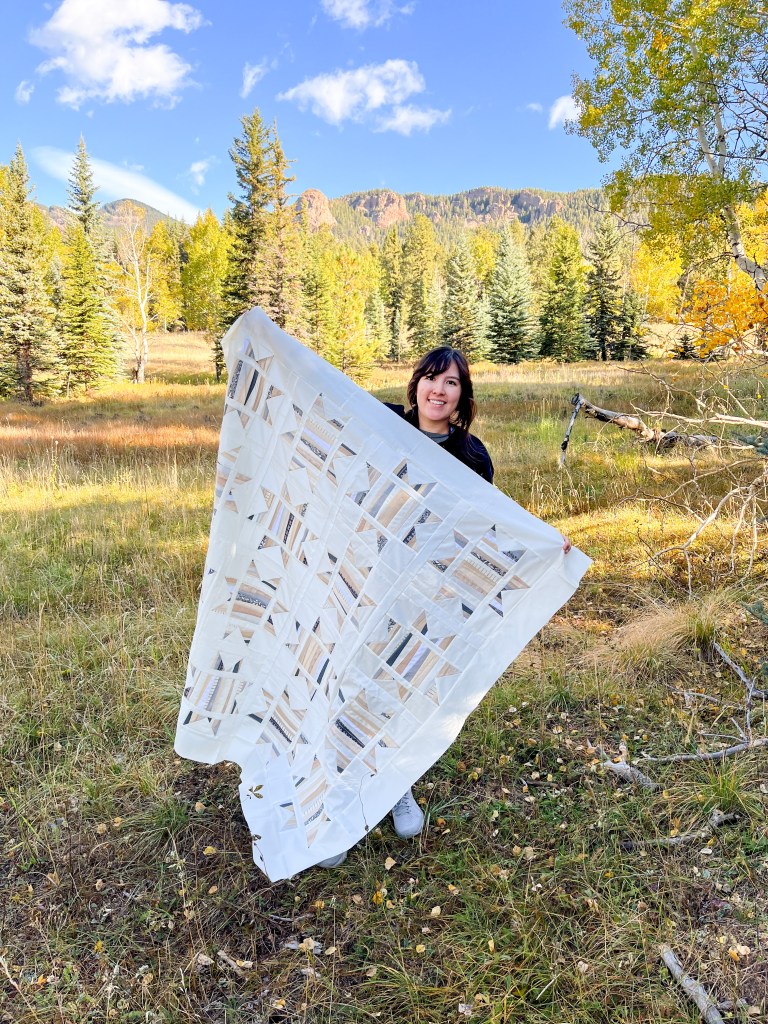
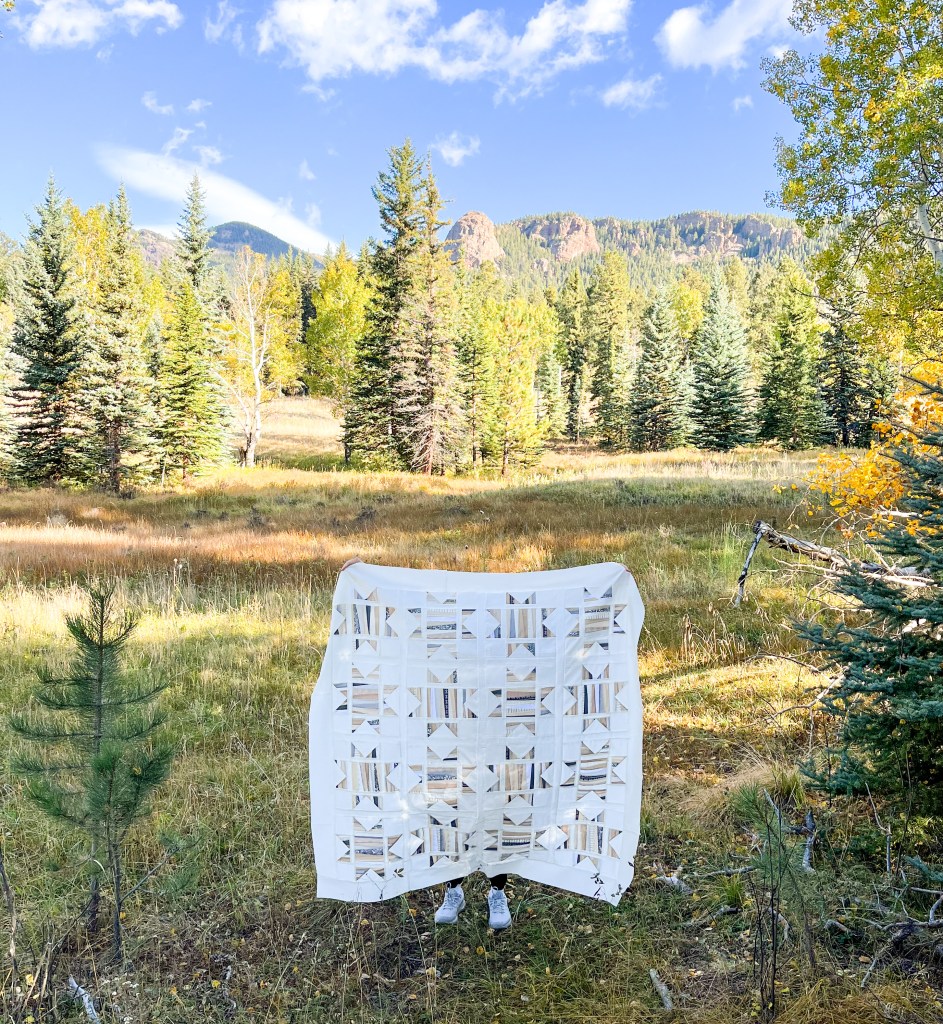
5. You’re done! Take lots of pictures to document your success, and share on Instagram or TikTok and tag using #snugglestarquilt and @pinestatestitches – I can’t wait to see your quilts!

Leave a comment